Showing posts with label Artist Tools. Show all posts

Thursday, August 5, 2021

My favorite Photoshop tips and shortcuts

Hi everyone! Robin here. I love working digitally. It’s like having a super power. Duplicate! Transform! Undo! I’ve been using Adobe Photoshop for a while, and I am totally delighted when I learn a new tip or shortcut that changes the way I work, saves me time and frustration, and makes me a better illustrator.

Here are some of my all-time favorite Photoshop tips and shortcuts, and some great tips from my fellow illustrators. (Feel free to add your favorites in the comments.)

A spread from A GIRL LIKE ME, by Angela Johnson, illustrations by Nina Crews, 2020, Millbrook Press, an imprint of Lerner Publishing Group. Nina originally had about 35 layers in this file. You can learn more about her process here.


When you need to organize and find your layers....

Author-illustrator Nina Crews says, “Working in layers is one of my favorite features of Photoshop. With layers, I can add, move, adjust or take away elements quickly and easily. This allows me to take chances and push things around more than I might otherwise.” I wholeheartedly agree! Layers are magical, but things can get messy and confusing very quickly. Here are some tips to get a handle on those millions of layers in your file.

1. Name your layers: “A Photoshop file with a lot of layers can become pretty unwieldy, so it is important to label and organize as you go along,” says Nina. “If you double click on the layer name you can edit it.”

2. Group your layers: Nina also suggests grouping your layers to better organize the elements in your image. For example, you might want to put each of your characters in a separate group. Select the layers you want to group — hold down the command key to select multiple layers — then click on the folder icon at the bottom of the Layers panel.

3. “Collapse all groups”: You can find this in the flyout menu of the Layers panel. (It’s the menu you see when you click on the hamburger icon in the top right corner.) This is a quick way to close all of your groups of layers at once. 

4. Right-click on the image to find your layer: This is my FAVORITE SHORTCUT OF ALL TIME. Make sure the Move tool is selected then right-click on your image. You will get a drop-down menu with all the layers that are under your cursor and you can select the layer you need. Game changer.

Here’s a video of the right-click layers trick. The image is from TWO DOGS ON A TRIKE, by Gabi Snyder, illustrated by me.


This file has about 160 layers! Here I am right-clicking on the image while the Move tool is selected in order to access the various layers under my cursor. (Image from TWO DOGS ON A TRIKE, by Gabi Snyder, Illustrated by Robin Rosenthal, Abrams.)

When you want to organize your colors....

Creative Cloud Color Libraries: This was another game changer for me. HUGE. I learned about Color Libraries from illustrator Teresa Bonaddio a few years ago when I asked Kidlit Twitter for help with organizing my color swatches in Photoshop. Thanks, Teresa! (Note: I think you need Creative Cloud to use this feature.)

Color Libraries provide a very clear way to organize your colors. You can create swatches, name them, and group them in folders by project, character, or however you like. You can also change the order they appear in your list, move them from one group to another, duplicate them, and edit them.

This tutorial on the Adobe site can help you get started:

https://helpx.adobe.com/indesign/using/creative-cloud-libraries-sync-share-assets.html


For the BIG IDEAS FOR LITTLE PHILOSOPHERS series, I created a color library for the series, and then a group for the swatches in each book. You can display your library as swatches (left) or in a list (right) and name, edit, and move them.


When you want to change colors quickly and easily….

Color Overlay: I color almost all of my artwork using the Color Overlay. Color Overlay allows you to change the color of any layer instantly. I love this feature because I can fiddle around with colors up until the end of the project, iterate quickly, and easily change one item without affecting others. I prefer to right-click on a swatch in my Color Library and select Color Overlay to change my layer to that color, but you can also select your layer then select Color Overlay from the fx flyout menu at the bottom of your Layers panel.

(This works if you have elements of your illustration on separate layers, and I suspect maybe there are quite a few of us who do this. Also I think some illustrators maybe do this with masks somehow? Let me know in the comments.)

Here's a video that shows Color Overlay in action. (This is a little lizard I drew for Parents magazine.)


When you want a more flexible way to erase…

Mask instead of erase: Author-illustrators Jen Betton Rogers and Debbie Ohi both agree: use masks, don’t erase. When you use masks, you are not permanently erasing something, just hiding it. Debbie says, “I use masks instead of erasing. The non-destructive edit makes it possible for me to change my mind later.” Okay this is really cool and it never occurred to me. You can read more about how to do this here:

https://design.tutsplus.com/tutorials/quick-tip-layer-mask-vs-the-eraser-tool-in-adobe-photoshop--cms-24392

When you want to iterate quickly….

Symmetry mode: I love to use this feature when I am developing characters and making lots of small changes to get a character just right. You can find the Symmetry mode by clicking on the butterfly icon in the Options bar along the top of the screen, and you can use it with the Paint Brush, Pencil, and Eraser tools. It's really fun to play with!

A still of the Symmetry mode in action. Here I am using it to iterate character designs for Plato.

Here’s a video of me developing Plato for LOVE WITH PLATO using the Symmetry tool.


When you need some straight lines…

Use a ruler on top of your tablet! A clear one works best. I came across this great tip while watching a video Gina Perry made about her illustration process. Thank you, Gina! Here's the video: https://youtu.be/sgMbpnTWDHQ

When your artwork is big and your scanner is little...

Photomerge: Writer-illustrator Shawna Galey Avanessian says, “I have a pretty good scanner but it’s not a very big scanner. With Photomerge I can paint large illustrations and still get a full scan.” 

Here's how to use it: https://helpx.adobe.com/photoshop/using/create-panoramic-images-photomerge.html

When your scanned or resized art feels a little soft…

Unsharp Mask: I first learned about Unsharp Mask from this Cargo post about thumbnails (scroll down to the bottom), but I’ve found this filter really useful for scanned art and resized art to just give it a little more crispness. You can find it in the Filter Menu > Sharpen > Unsharp Mask.

I usually do: Amount: 25%-50%, Radius: 1-2 pixels, Threshold: 0 levels. The Cargo post recommends some different values now so I’m gonna try those, too (Amount: 65%, Radius: 0.5 pixels, Threshold: 0 levels). They have some other good info about Unsharp Mask in that post as well. 

The following post is about editing photos but it explains Unsharp Mask in depth:

https://www.photoshopessentials.com/photo-editing/how-to-sharpen-images-in-photoshop-with-unsharp-mask/

When you want to see all your Photoshop files easily (with bigger thumbnails)…

Adobe Bridge: This is a separate application, but it is free to download and I love using it to find and organize my files for a picture book project. I use Bridge instead of going to a folder on my hard drive to browse and open my files when I need them. You can control the size of the thumbnails so it’s easy to tell what is what. Here are some posts about Bridge:

https://prodesigntools.com/free-adobe-bridge-cc.html

https://helpx.adobe.com/bridge/using/adobe-bridge.html


Here’s my Adobe Bridge window. I can see all the files for IMAGINATION WITH RENÉ DESCARTES very easily and open them directly from Bridge by double-clicking. There’s a slider on the bottom right if I want to change the size of my thumbnails.


And finally, some favorite keyboard shortcuts:

1. Command-J = Duplicate layer. (Via Nina Crews. Thanks, Nina! You can also right-click on a layer in the Layers panel and you will get a flyout menu with lots of options, including Duplicate Layer and Delete Layer.)

2. Command-T = Transform tool

3. Command-Z = Undo 

4. Command-; = Show/Hide Guides

5. Command-S = Save

And you can find some more shortcuts here:

https://helpx.adobe.com/photoshop/using/default-keyboard-shortcuts.html

If you want to explore more shortcuts I suggest right-clicking on your file when you have different tools selected and see what comes up. Also check out the flyout menus across all the different panels. You may discover some cool stuff there that will save you time. 

Good luck! Let me know your favorite tips and tricks too!

_______________________

Robin Rosenthal is an illustrator and art director. She has illustrated TWO DOGS ON A TRIKE and the BIG IDEAS FOR LITTLE PHILOSOPHERS series of board books. She grew up in Connecticut and now lives in Brooklyn with her husband and daughter. You can see more of her work at robinrosenthal.com.

Instagram: @robinrosenthal

Twitter: @robinarosenthal

Monday, July 8, 2019

It's A Wonderful Life

As children's book writers and illustrators, we are a part of this amazing community that sees the world from the unique perspective of tiny humans. Something I hadn't considered until recently is the fact that many of the professionals working in this field are also balancing parenting (sometimes full time) while creating too.

Curious about this, I did a search for articles that would answer some of the immediate questions I had regarding the maintenance (and growth) of a creative career while being a parent to a little one. I started rifling through old SCBWI magazines that I had kept while perusing the internet and was surprised that I found more questions than answers. 

So I went to the experts and interviewed three Mentees who are balancing their creative careers while being awesome parents too! They had some wonderful insight I am excited to be sharing with you. Whether you are an expecting parent or a one that's already in the trenches, this article is a must-read on how to keep swimming.


Q: How do you balance staying home with little ones and still have time for your creative work?

CORINNA:  It’s tricky, for sure. I think it’s important to remember that this is a phase, and your children will grow up quite quickly. It may not seem like it at first, but as they say- the days are long but the years are short. This is SO true. 

I have found that it can be helpful to remember that limits are not necessarily a problem- they can also be your friend. Perhaps when your children are very young it is not the time to experiment with an overly complicated style.  Those early years are a great time to take honest stock of your strengths and weaknesses as a writer or illustrator and then play to your strengths! Embrace the things that you know you do well.  It can also be helpful to use materials or techniques that you can walk away from and come back to it without having to do major cleanup each time. Watercolor is wonderful for this. Or maybe it means working in small 20 minute increments, but learning how to string those increments together.  One tip that I learned for this, is to always stop when you are still slightly in the zone and have a clear idea of what you’re going to do next.  This gives you a quick and easy re-entry point the next time you are able to work on the piece again.  Because if you work on a piece until you have no idea what comes next, and you are interrupted often, it can be hard to find your way back into the flow.  But if you know what you want to do next, even if it is something as simple as making a pair of shoes red, you have a way back in.  

Also, you can surprise yourself.  I never thought I’d be able to work at night. But I found that I could put my daughter to bed at night and fall asleep with her, then wake up after 20 minutes or so and work from 9pm until 1 or 2 am.   This isn’t an ideal schedule for me, and as soon as my daughter entered kindergarten I went back to work during the day.  But it was definitely something that I could manage for a few years to make more uninterrupted time for art making.  I have found, especially when you’re tired,  that the first few minutes are the hardest.  But if you can just sit down in your chair and pick up a pencil and start working… you can find your way into a rhythm more quickly than you might think.  It’s mysterious in a way, but I have found that where ever you can make the time and space for creative work, it will meet you there. 

SUZANNE: I push a schedule to work earlier before everyone gets up.  Also during crunch time, my family leaves for weekend trips to let me focus for a few days.

I also bought a portable Cintiq I have used in the car, soccer practice, or anywhere in between.

SUNGYEON: I think it is super hard to do anything creative until the baby is two or three. I got help as much as possible like a food delivery service, grocery shopping service, a robot cleaning machine, a dishwasher, an air fryer, and an instant pot. I used my iPad as my main creative tool.  It is quick, simple and easy.  In this time, quality is not that important, quantity is precious. Quick doodling, quick sketch and a quick note kept me in a creative loop. 


Q: How do you manage to stay motivated when your brain is running on zero sleep?

CORINNA: Sleep is so important— for your body, mind and creative spirit… and not something that you want to sacrifice for very long. After about a year of working late at night and not sleeping very much, I started to notice it was affecting me.  As I continued to work at night, I made sure to take afternoon naps with my daughter.  This allowed me to work at night for a few more years without it taking as much of a toll.  Ultimately, this is something I think you can do for bits of time... on a deadline etc... but in the long run, it’s important to make sure that you have a healthy lifestyle and to keep the long view. Be patient. Be kind to yourself. Be realistic about your priorities at this stage- because it IS a stage. And it will pass. 

Also keep in mind, that even when you are not making art, as long as you are parenting a small child, you are absorbing SO many influences for your art.  Your heart is growing and your understanding of children is growing.  It might help to think of it as the research stage of your bookmaking life.  Because no matter how tired you are, you will certainly be looking at TONS of picture books together.  And this will not always be the case.  On those days when you are SO tired, I think it also helps to keep your work loose and rough. To think of what you are doing as notes, quick sketches, and imagine that you are saving up some of these impulses and ideas for another day.  Now that my daughter is almost 10, I have more time for work.  But she’s no longer the perfect age to use as a model for most picture books and she no longer says and does all those strange, wonderful, surprising things that very small children say and do.  

SUZANNE: I try to read at least a few picture books every day and sneak in sketches with crazy materials.  This inspiration keeps me going.

SUNGYEON: Please sleep whenever you can. I went to urgent care a couple times for exhaustion and it was not worth it. Wait and think about what you will do when your baby goes to preschool. Meanwhile, go to the library with your baby and research and study children's books with them. It is a precious reference, and babies are experts with children's books. Learn from them. It is your research period. 

Bank your stories/ideas in a notebook as you research. In a couple of years, you will be ready to sit down and carve out these ideas.  


Q: What is one piece of advice you wish someone had given you when you were first trying to find time for creative work with a little one?

CORINNA: Be patient. You will have more time to work on art and books soon enough.  Your child will grow up SO fast, and they will want to hang out with their friends more than you.  So treasure this time.

SUZANNE:  That is was OK to be selfish with your time.  That I deserve to have this time and it doesn't make me a bad mom.  I struggle with this still.

SUNGYEON: You may not have the luxurious 3-5 hours of creative time, but you can still find it here and there. The longest time you may find might be less than 30 minutes if you are lucky.   So plan ahead for creative time when baby falls asleep.  I made lists of what to do for  30 minute blocks. When the time comes, don't look at dirty dishes or surf the internet. Utilize your precious 30 minutes meaningfully. 

Take turns with your partner.  Have baby-free time one evening, and give your partner baby-free time another evening.  


Q: Is there anything you wish you would have spent more time on or prepped more for before your little one arrived?

CORINNA: It’s such a difficult thing to “be prepared” for.  In many ways, I think it’s best to be prepared to be unprepared.  Make peace with the fact that life is going to surprise you and that those surprises and the messiness of it all are also the essence of life itself.  The truth is that being a parent (and balancing parenting with a creative career that will take as much of your time as you can give it) can be very difficult at times.  But being a parent also opens your heart up in an incredible way. And this can be a tremendous gift to your art making, in the long run.  Ultimately, making picture books might be your dream, just like it was mine, but it isn’t going to make you happy.  The more books I make, and the more my career grows, and the busier I get, the more this becomes very very clear to me.  Happiness or contentment—or whatever you want to call this thing that we are all searching for…really can only exist right here, right now, in all the tired and mess and hoping and wishing and failing and trying again.  

SUZANNE: Setting up childcare and not feeling guilty for wanting to do both.  I wish I would have felt comfortable spending the money on a good computer and a Cintiq tablet.  I felt all the money should go to the new family and that I could get by.  It was only after winning the mentorship I gave myself permission to stop using my 15-year-old tablet from college.   

SUNGYEON: Baby-proof your art space.  Organize art supply drawers, so that you can work efficiently. Donate unnecessary art supplies, and simplify your environment.  You will fill up space with lots of baby stuff, but don't give up your art corner.

Also, don't spend too much time decorating the baby's room. Babies don't care about their rooms and they will want to replace the beautiful elephant and flower mural paintings with superheroes and princess when they grow up, anyway.

I transformed my art room into the baby’s room before the baby was born and it took three years to convert it back to my own space. Luckily, I wrote some baby diaries to remind me of wonderful times.   I wish I drew more and took more pictures of my baby.  Enjoy the precious moments!  They don't come back until....... you have a second baby! :)


~Jeslyn Kate


Jeslyn Kate writes/illustrates for children and teaches art.
You can find her work at these different locations:
Website:www.jeslynkate.com
Instagram: Jeslyn Kate
Twitter: @jeslynkate
Facebook: https://www.facebook.com/jeslynkateart


Friday, May 18, 2018

"An Artist is an Explorer"

I have this simple post-it-note, scrawled in my husband's hand, pinned to my studio door. It's the first thing I see when I level my eyes and cross the threshold from me - to artist me.
For most of my life, I've identified solely as "artist me." Yes, I was a daughter and a sister, I was a friend. I was a Mexican Hawaii-girl, a swimmer, and a dog-person; but mainly I was an artist. I made this distinction at about five-years-old and held onto it for dear life. I held onto it all through high school and college and well into my non-stop career as a corporate career-girl. When I left New York City four years ago, I was working sixty-to-eighty hours a week as a deadline-oriented video game designer. In my head, I was still an artist, but in my heart, I wasn't so sure.

My husband works as a chef. He walks the line between talent and hard work with grace and style. In the middle of my identity crisis, I came home one night to find him boiling a cucumber. I'm no kitchen wizard, but even I know - one simply does not boil cucumbers. I pointed out this obvious truth. "Really, Amber? Do you know what happens to a cucumber when it boils?" I admitted that I did not, to which Matt responded, "Yeah, me neither - but I'm about to." 


When I arrived at the studio the next morning, I was armed with the aforementioned post-it and a gauntlet. My art has grown in quality and joy exponentially ever since. 


Here's what we discussed that evening and the things I have learned as a result. I hope they bring you clarity and excitement the way they have me. 


1. Put on your lab coat, kid. 
I literally put on a white trench at least a few hours a week. When I am wearing it, I suspend disbelief. I am not an artist, I am a scientist. The issue with coming to children's books from a traditional art background is that you arrive keenly aware that there are right ways and wrong ways to make art - but what if there weren't?

In a lab, there is only cleanliness, hypothesis, trial, error, focus and the raw thrill of discovery. Create an environment where these six elements can thrive. Now dive!


2. Learn by doing.

Scientists know that the best way to learn everything is through experiments. Classes, books, and even conferences are fantastic - but only as long as they serve the work. A professional doesn’t worry about knowing every technique under the Sun. If all process and cure had already been found, science would die. The excitement of uncovering unknown is born through action. Theories are where you start. The rule in my lab is that if I have an idea on a Monday, I had better be testing on Tuesday. 

3. Delve into new/old materials.

In 2016 my brother & sister-in-law gifted me a hundred dollar box of Prismacolors. It was all I could do to suppress a cringe. A decade ago, fresh out of college, I spent a year and a half, or 32 episodes, designing the Pre-K T.V. extravaganza - PINKY DINKY DOO. My numero uno design tool? Prismas.  Just holding that deluxe box gave me flashbacks. I had hated those colored pencils with my whole heart. I decided to exchange the Prismas for what I knew belonged in my studio, Winsor Newton watercolor paints. As luck would have it, while distractedly sorting through a pile of mail, I accidentally unwrapped the factory plastic on the box. It took me six months to finally use them. The rest is history. I now use colored pencils - of all kinds, every single day. They're an essential part of my toolkit, and I NEVER would have picked them up on my own.

After the Prisma Incident, I made a commitment to buy one tiny untested-by-me-recently thing every time I went to an art store. This habit costs less than ten dollars a month. Some purchases are total duds, but others are kidlit magic. Before I became a scientist, I created with Windsor Newton watercolors, Arches 300lb cold press, and Adobe Photoshop. I now use water-soluble graphite, Copic markers, General's Chalk pencils, Gamsol, Uni-ball Signo gel pens, Brusho element pigment, vinegar, acrylic paint and calligraphy Ink of all brands on the regular. As a scientist, I know that the viscosity and staining power of each brand of calligraphy ink varies drastically. I use different brands of colored pencils at various stages of my work. I use Photoshop in a quick and precise way - and I do not lean on it. I've learned that for me, traditional methods are more fun - something I'd never have known if it weren't for my lab.


4. Be clear about your intentions.

Scientists often pivot at some point in their research, the thing they hoped would cure x instead prevents y. They hold both nature and control in their hand. So do you. Through your experiments, you will most likely stumble on fantastic byproducts of your research. Without a focal point, you'll wander too far from x or y. 

This year I'm using my lab to: 

1. Speed up my process.
2. Incorporate more of my sketches into my final art in a way that feels finished but open. 

If you wander aimlessly through your proverbial petri dish, you're gonna lose dat funding.


5. Take control of one constant. 

The marks below are all made with the same tool - a Vermillion General's Pastel Pencil, on six kinds of paper. 

Assumption is the death of science. If something is not working in the environment you've created, change things up before you throw in the towel. Follow your intuition. Hunt surprise.  

6. Punch in and Punch Out.

Discovery takes time. Ideas need space to grow into maturity. So do you. At the height of my creative frustration, I had transferred the sixty plus hours I worked in the corporate art world directly into my studio. I expected the same furious pace to result in a similar amount of measurable forward motion. When I was disappointed with my results, I worked harder and longer. Overworking yourself in a tornado of misguided "productivity" blinds you to the delicate unfolding of the unexpected. It blocks your intuition. Shockingly enough, I now know that I make more and better art, enjoying it tenfold, when I clock 25 hours in the studio and six in the lab a week. I keep professional lab hours, living my life as a wife, daughter, friend, sister, swimmer, reader, hiker, dog-person with glee. Taking time away counts toward my productivity and power as a maker, not against it. Afterall, I get my best theories out in the field. I have every confidence you will too.

xo,
Amber
.........................................
www.AmberAlvarez.com
Instagram @shesureissketchy
Twitter @shesureis
SaveSave
SaveSave

Friday, February 2, 2018

Breathe

Who's to say
the real effort to be real 
isn't the beginning of wings?

The above is an excerpt from Mark Nepo's THE BOOK OF AWAKENING. It met my Brooklyn studio in the stifling summer of 2013; a gift from a dear friend who knew I needed a change. It set me on the path of making and breathing and living happily in the moment.

My impression of meditation had always been enough to keep me from trying it. I couldn't imagine what crossing my legs, and muttering long vowels would possibly accomplish.

It turns out, meditation is a twisty-turny thing, and there are as many ways to practice it as there are to make a picture book. Among other things, it is scientifically proven to help its practitioners alleviate stress, depression, and anxiety, improve self-confidence, increase focus, develop positive social connections and prevent arthritis. Writers and illustrators are my favorite kind of people, but I'm yet to find one that couldn't benefit from that industry-specific list of preventatives. If you're uncomfortable with OMs, consider guided meditation, that's where I started.

Daily mindfulness practice has taught me that one thing done with patience and peace is much better than ten things done in a panic. My life and my art are more effortless, comfortable, and fun when I quiet my mind for 5-20 minutes every day.

Meditation is my key to living creatively. It might be what you're looking for too. Not ready to dive into the deep end? Consider dipping your toe in the lotus pool.

Try an app:
・Aura on iPhone and Android
・Aware on iPhone & Android
・Calm on iPhone & Android

Or a podcast:
Deep Energy 2.0
Meditation Minis
The Meditation Podcast -
 a $2 a month Patreon subscription pays you back ten-fold in happiness. Choose an episode for what ails you. The CREATIVE FREEDOM episode is a new ritual. They make their most recent episode available free on their website 

Try a meditation for the painter in their studio:
・Place a dry sponge and a glass of water before you.
・Center yourself by letting the energy of all that feels urgent rush through you. 
・Exhale and try to let it go.
・Now drip a small stream of water on the sponge.
・As you breathe slowly watch how the sponge opens.
・Keep dripping water on the sponge as you breathe slowly and feel your heart open

xo,
Amber
.........................................
www.AmberAlvarez.com
Instagram @shesureissketchy
Twitter @shesureis
SaveSave
SaveSave

Tuesday, March 21, 2017

Peerless Transparent Watercolors...Wow!  

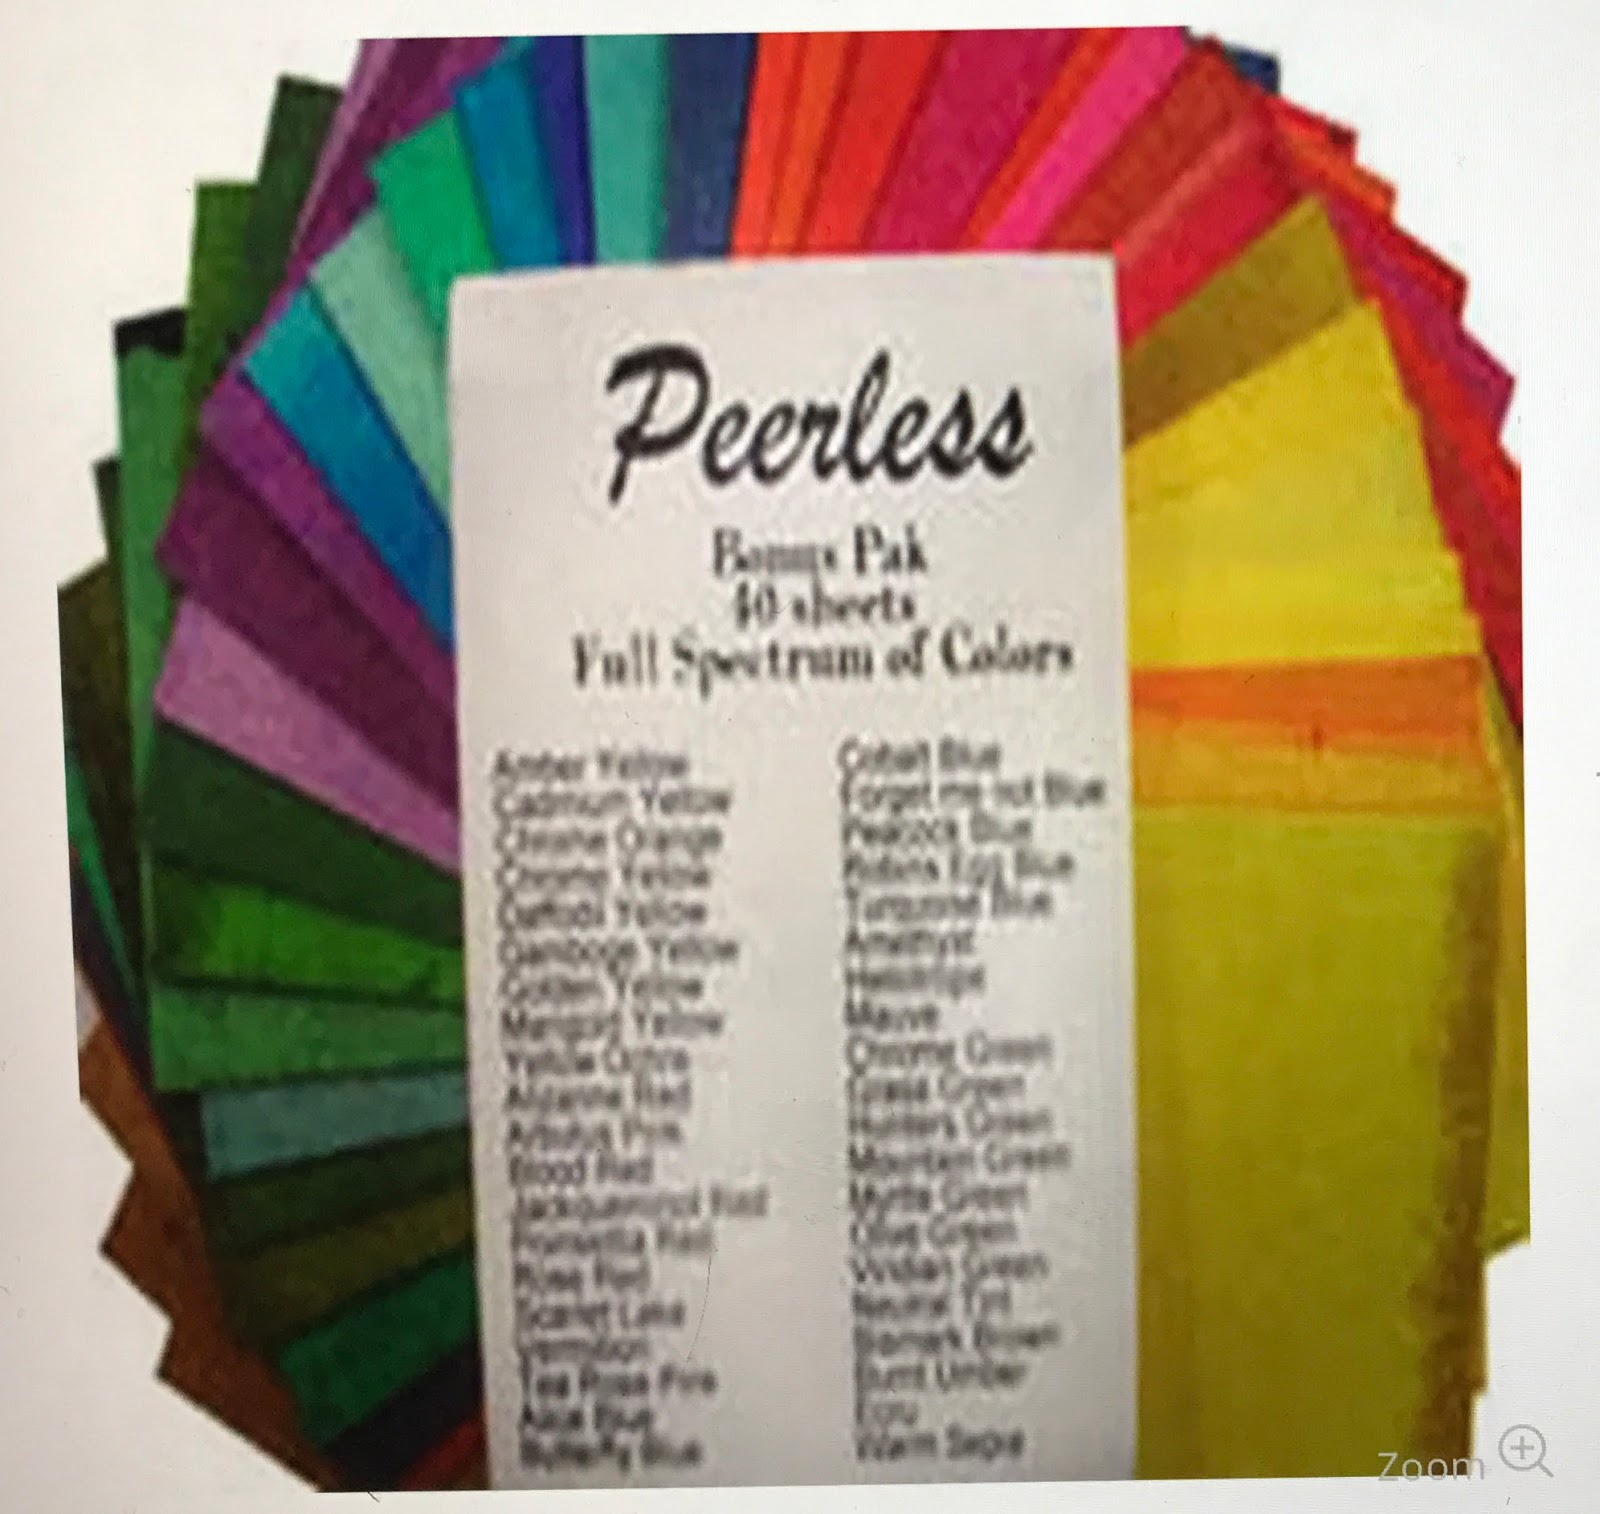
In 1885 Chas. F. Nicholson developed a revolutionary way to offer transparent watercolors in sheet form. The saturated watercolors are infused onto a sheet of paper. Just a small drop of water releases bright transparent colors. 

I'm sharing what I discovered about these surprising old paints. I've also included instructions on how to make your own Travel Peerless Watercolor Palette Book- perfect for sketching on the go. 

They will not replace tube or pan watercolors, but for transportability and ease of use, they might prove to be a fun addition to any artist's toolbox.


I was so excited about these paints for several reasons:

1. Bright transparent colors.
2. Inexpensive (40) colors for ~23$.
3. Lightfastness is good. (Review) 
4. Compact and lightweight for everyday sketching small - medium sketches. 

Travel Peerless Watercolor Palette Book
(*I made four books at one time. They make great gifts for artist friends. Your book can be adapted any way you like. Below is how I assembled mine.) 


Supplies:
2- 5" x 7" Mat Board (Cover)
3- 5" x 7" Card Stock (To adhere paint squares)
4- 5" x 7" Acetate sheets (Dividers-Front -Back)
Mounting Putty
Scissors
Exacto Knife
Double Sided Roll on Tape
Scotch Tape
Duck Tape (Any Color) Phew... Lots of tape
1- 5" x 7" WC Paper (WC swatches) 
Elastic String ( Hobby shop- I think it is used for funky jewelry) 
40- 1.5" Watercolor Paper Squares 
Water-brush


Directions:


Open Peerless Watercolor Bonus Package- Print name of color on each sheet.
Cut it in half twice to get 4 squares.

 ( If you are only making one book, store other 3 for future when colors need replaced.)


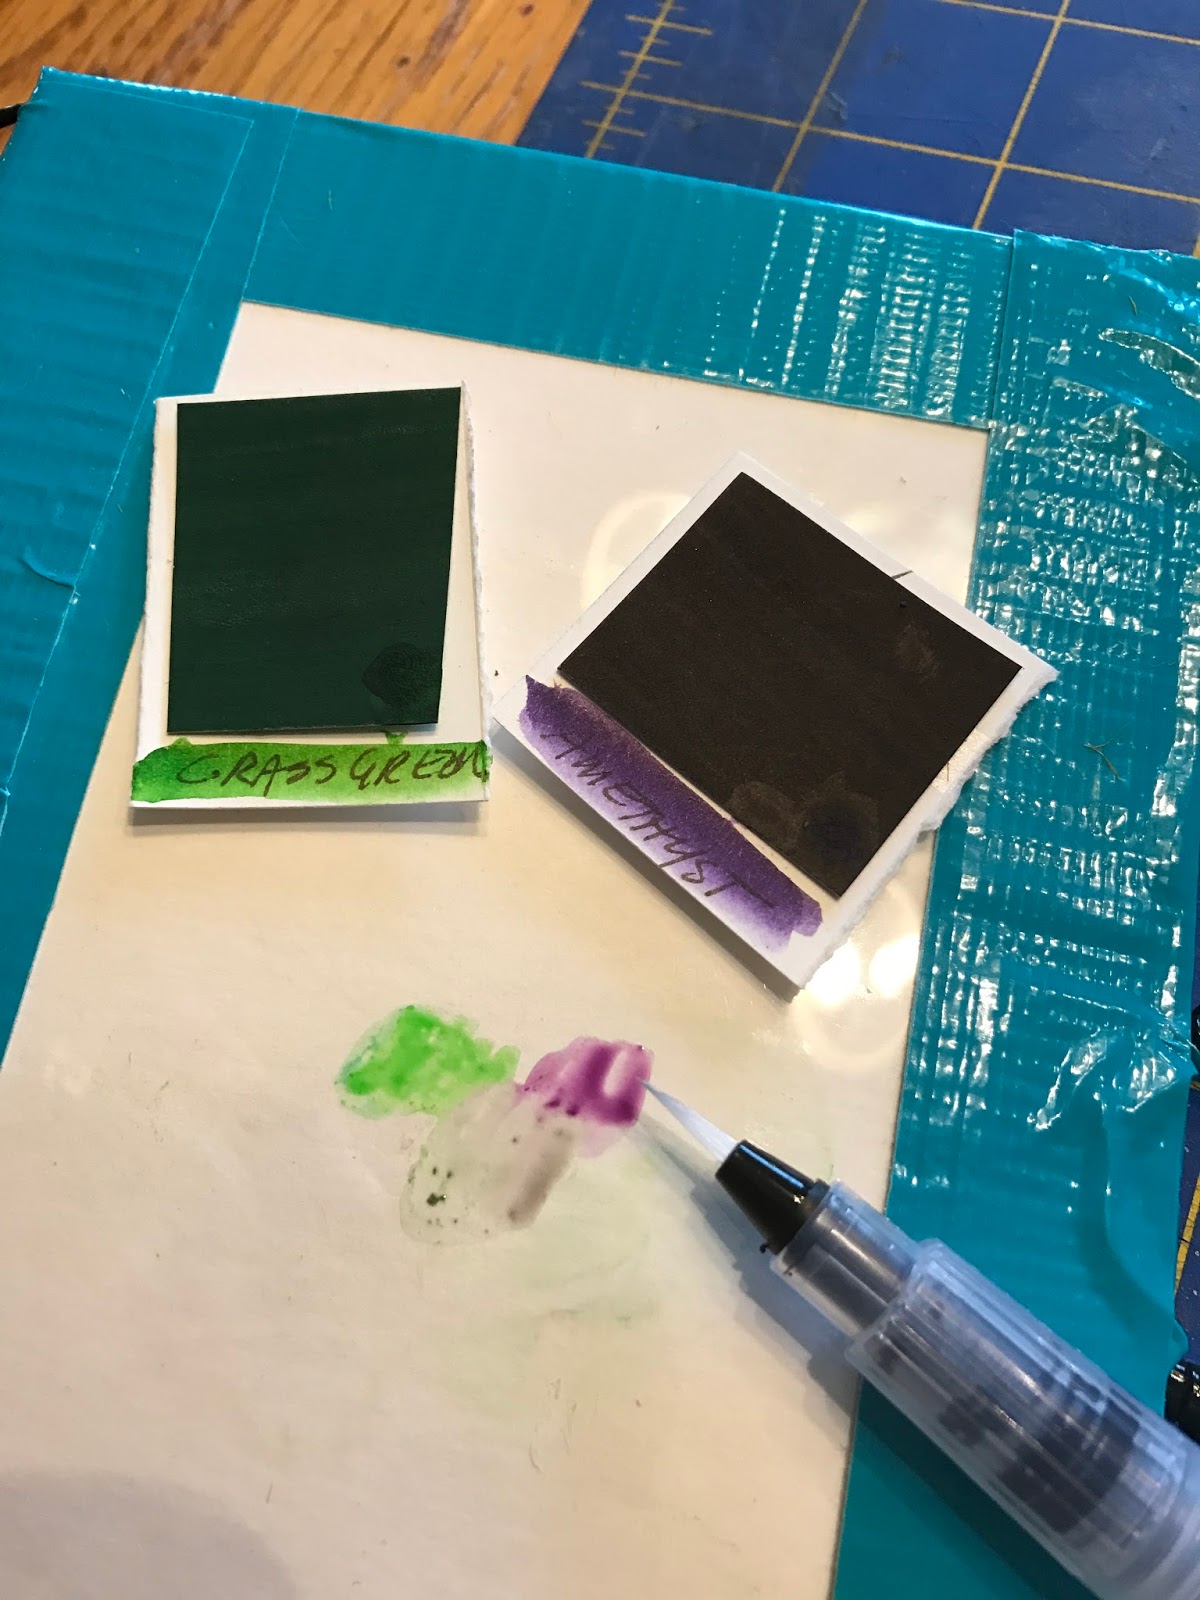
Use Mounting Putty to attach color swatch to watercolor paper.  With Water brush, wash color on WC paper, print name of color and tear or cut to size.  


Do this with all of the color squares and attach them to the card stock pages.  


When all of the color squares are attached to card stock. Using Scotch Tape, attach acetate between each color page. Do this for all pages so that the color pages flip like a book. This will help to keep colors separate so they will not bleed into each other when the book is closed.  


Tape the edges of the cover with Duck Tape and attach it to the color pages. I photocopied the history of the paints and attached it to the inside cover.   


I also added a color wheel  for  reference and taped an acetate sheet to the back cover to use as a mixing palette.  


Loop the elastic string and tape it to the edge. (This will hold your water brush)   
I added an elastic closure on the right. Use Duck tape to attach.
At this point the book is complete. 


But to personalize them, I painted the covers with Daniel Smith Watercolor Ground. 
You can remove each color square from the book and use the acetate back cover to mix paints. Replace when you are done. To keep the colors pure, wipe water brush on paper towel each time you change colors. 


The colors are transparent, bright and fun to use. I hope you enjoy. 


~Dorothia Rohner illustrates and writes stories for children about nature,  magic of imagination and humor.
Represented by: Laura Biagi- JVNLA.com
Twitter: @dorothiar
Instagram: @dorothiar