
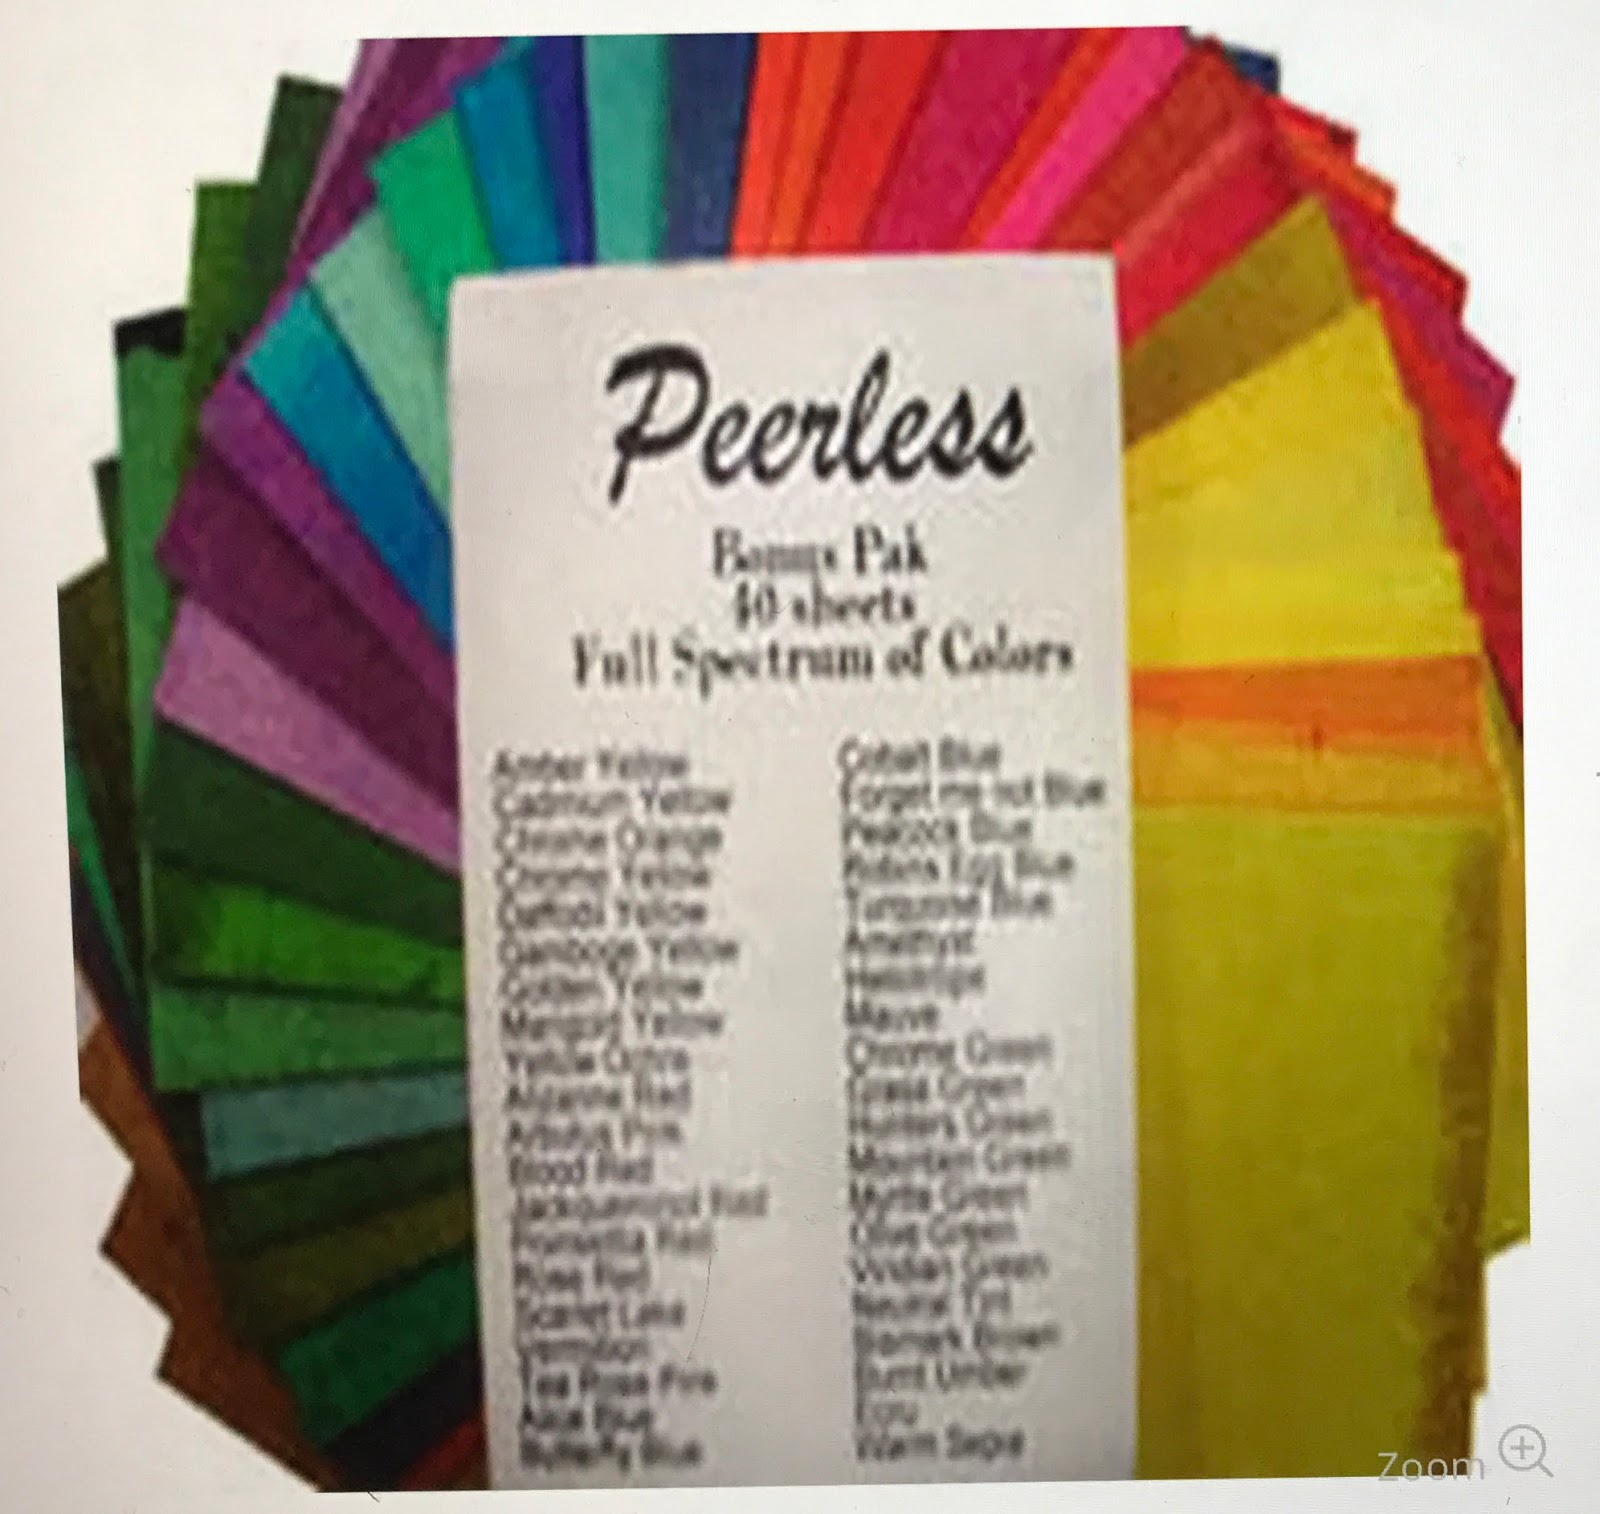
Peerless Transparent Watercolors...Wow!
I'm sharing what I discovered about these surprising old paints. I've also included instructions on how to make your own Travel Peerless Watercolor Palette Book- perfect for sketching on the go.
They will not replace tube or pan watercolors, but for transportability and ease of use, they might prove to be a fun addition to any artist's toolbox.
I was so excited about these paints for several reasons:
1. Bright transparent colors.
2. Inexpensive (40) colors for ~23$.
3. Lightfastness is good. (Review)
4. Compact and lightweight for everyday sketching small - medium sketches.
Travel Peerless Watercolor Palette Book
 (*I made four books at one time. They make great gifts for artist friends. Your book can be adapted any way you like. Below is how I assembled mine.)
 Supplies:
1 pack Peerless Bonus Pack - 40 Colors
2- 5" x 7" Mat Board (Cover)
3- 5" x 7" Card Stock (To adhere paint squares)
4- 5" x 7" Acetate sheets (Dividers-Front -Back)
Mounting Putty
Scissors
Exacto Knife
Double Sided Roll on Tape
Scotch Tape
Duck Tape (Any Color) Phew... Lots of tape
1- 5" x 7" WC Paper (WC swatches)
Elastic String ( Hobby shop- I think it is used for funky jewelry)
40- 1.5" Watercolor Paper Squares
Water-brush
Directions:

 Open Peerless Watercolor Bonus Package- Print name of color on each sheet.
Cut it in half twice to get 4 squares.
( If you are only making one book, store other 3 for future when colors need replaced.)
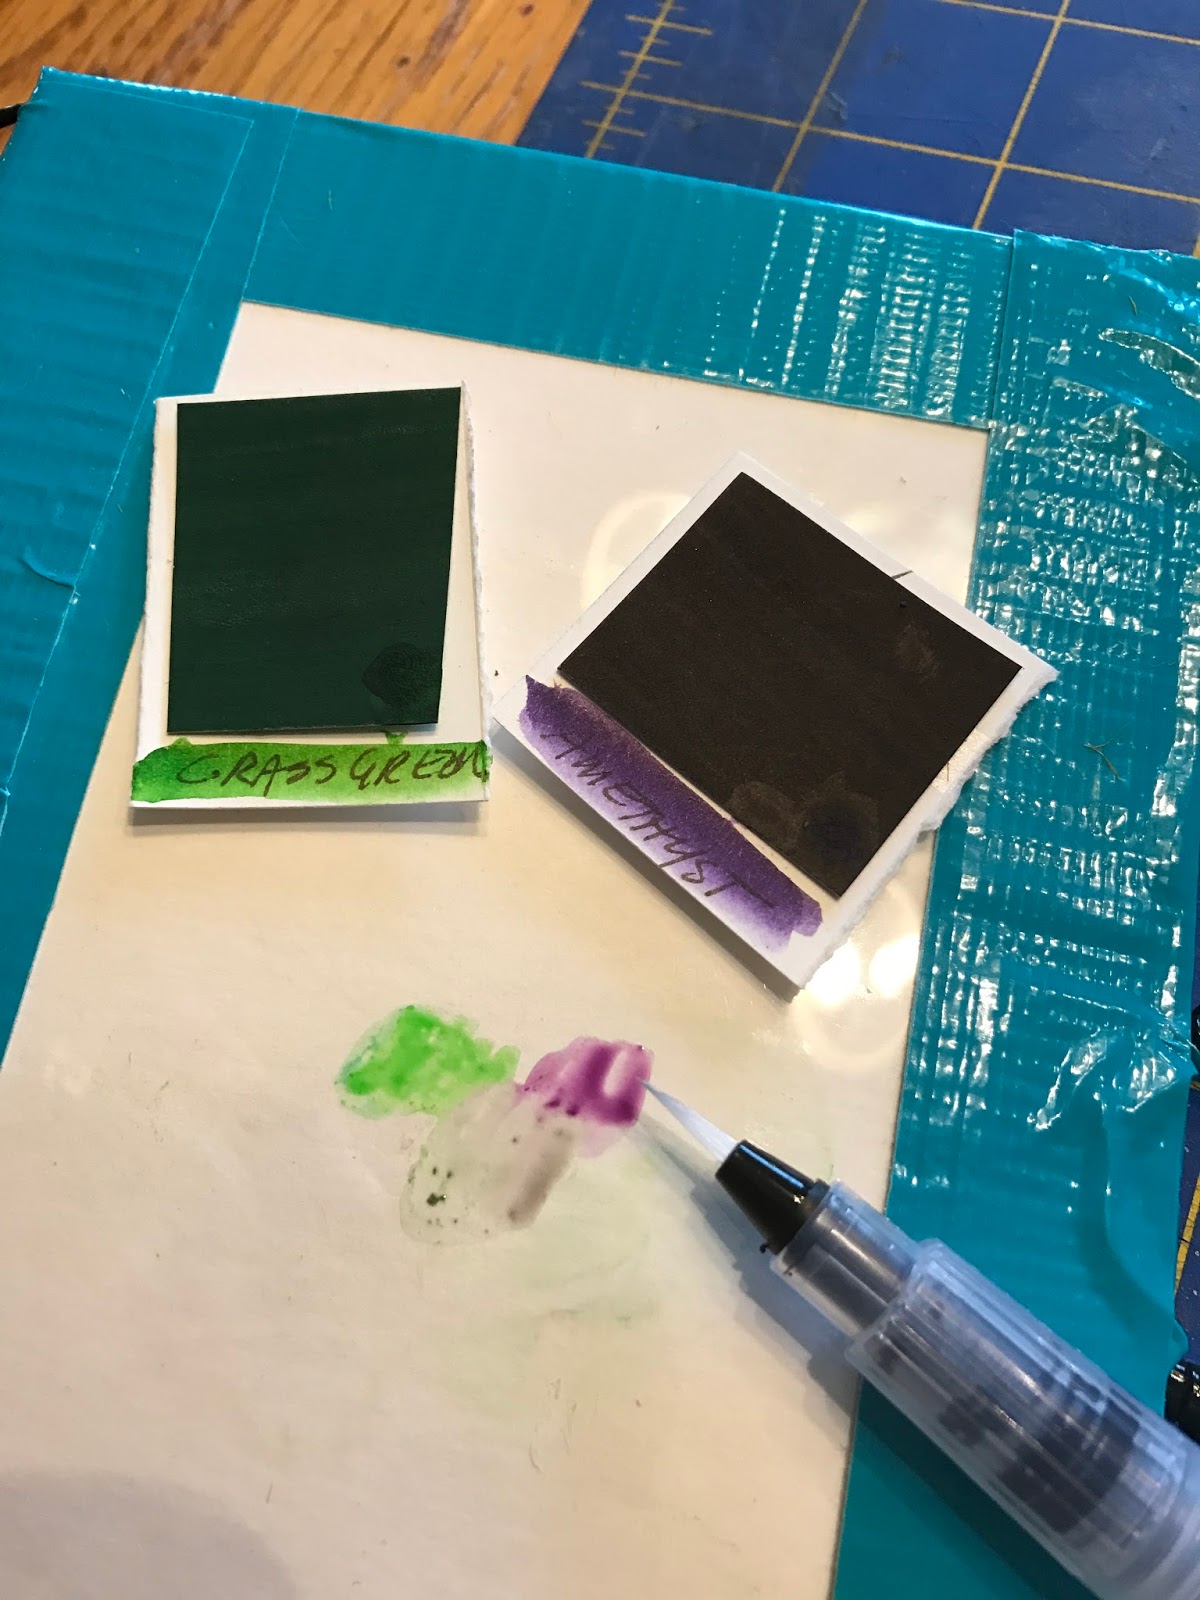
Use Mounting Putty to attach color swatch to watercolor paper. With Water brush, wash color on WC paper, print name of color and tear or cut to size.


Do this with all of the color squares and attach them to the card stock pages.
 When all of the color squares are attached to card stock. Using Scotch Tape, attach acetate between each color page. Do this for all pages so that the color pages flip like a book. This will help to keep colors separate so they will not bleed into each other when the book is closed.
Tape the edges of the cover with Duck Tape and attach it to the color pages. I photocopied the history of the paints and attached it to the inside cover.

I also added a color wheel for reference and taped an acetate sheet to the back cover to use as a mixing palette.

Loop the elastic string and tape it to the edge. (This will hold your water brush)
I added an elastic closure on the right. Use Duck tape to attach.
At this point the book is complete.


But to personalize them, I painted the covers with Daniel Smith Watercolor Ground.
At this point the book is complete.


 You can remove each color square from the book and use the acetate back cover to mix paints. Replace when you are done. To keep the colors pure, wipe water brush on paper towel each time you change colors.
The colors are transparent, bright and fun to use. I hope you enjoy.
~Dorothia Rohner illustrates and writes stories for children about nature, magic of imagination and humor.
Represented by: Laura Biagi- JVNLA.com
Website: www.dorothiarohner.com
Twitter: @dorothiar
Instagram: @dorothiar
No comments:
Post a Comment